
In the world of DIY projects and home repairs, power tools are game changers. They transform complex tasks into manageable activities and empower even the novice handyman with the ability to create, repair, and modify with precision and efficiency. The whir of a drill, the buzz of a saw – these are the sounds of productivity and the hallmarks of a job well done. However, for beginners, the vast array of power tools available can be overwhelming, and the prospect of using them, intimidating.
This blog is designed to demystify power tools for those just starting on their DIY journey. We’ll take you through the essentials – from understanding the different types of power tools and their uses, to mastering the basics of operation and safety. Our goal is to equip you with the knowledge and confidence needed to use these tools effectively and safely. Whether you’re assembling furniture, tackling a home renovation, or indulging in a creative project, understanding how to handle power tools will open up a new world of possibilities. Let’s embark on this journey together, turning apprehension into expertise, one tool at a time.
Introduction
In the world of DIY projects and home repairs, power tools are game changers. They transform complex tasks into manageable activities and empower even the novice handyman with the ability to create, repair, and modify with precision and efficiency. The whir of a drill, the buzz of a saw – these are the sounds of productivity and the hallmarks of a job well done. However, for beginners, the vast array of power tools available can be overwhelming, and the prospect of using them, intimidating.
This blog is designed to demystify power tools for those just starting on their DIY journey. We’ll take you through the essentials – from understanding the different types of power tools and their uses, to mastering the basics of operation and safety. Our goal is to equip you with the knowledge and confidence needed to use these tools effectively and safely. Whether you’re assembling furniture, tackling a home renovation, or indulging in a creative project, understanding how to handle power tools will open up a new world of possibilities. Let’s embark on this journey together, turning apprehension into expertise, one tool at a time.
Safety First: Power Tool Safety Basics
When it comes to working with power tools, safety cannot be overstated. Each year, improper use of these tools leads to accidents, some of which are severe. The foundation of safe power tool use lies in understanding, respect for the tools, and adhering to essential safety practices.
Reading and Understanding the User Manual: Before using any power tool, thoroughly read and understand the user manual. These manuals provide crucial information on operation, safety features, and potential hazards specific to the tool. Familiarizing yourself with this information can prevent misuse and accidents.
Essential Safety Gear: Personal protective equipment (PPE) is a must when working with power tools. This includes:
- Safety goggles or glasses to protect your eyes from dust, debris, and flying particles.

- Heavy-duty gloves to safeguard your hands from cuts, abrasions, and vibrations.

- Ear protection like earplugs or earmuffs, especially when using loud tools like saws or drills for extended periods.

General Safety Rules:
- Proper Handling: Always hold power tools firmly with both hands and stand in a stable position to control them effectively. Ensure that all guards are in place and functioning.
- Workspace Organization: Keep your workspace clean and well-lit. Clutter can lead to accidents, so make sure the area is free of unnecessary objects and tripping hazards.
- Tool Maintenance: Regularly inspect your tools for wear and damage. Keep them clean and store them properly when not in use. Dull blades or bits, frayed cords, and accumulated dust can compromise safety and tool performance.
Remember, most power tool accidents can be prevented with proper knowledge, preparation, and caution. Treat these tools with the respect they deserve, and they will serve as invaluable allies in your DIY endeavors.
1. Drills and Drivers
In the toolbox of any DIY enthusiast or homeowner, drills and drivers hold a place of prominence. These versatile tools, essential for a multitude of tasks, come in various forms, each suited to specific applications.
Types of Drills and Their Uses:gg
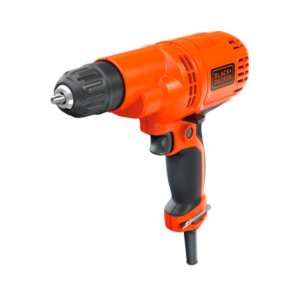
- Corded Drills: Known for their consistent power output, corded drills are ideal for tasks that require prolonged use or more torque, such as drilling through metal or mixing materials like paint or concrete.
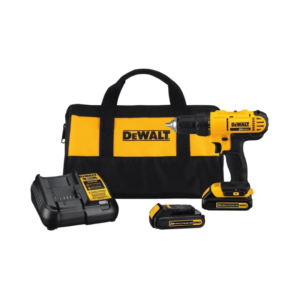
- Cordless Drills: Offering portability and convenience, cordless drills are perfect for jobs without easy access to a power outlet. Their battery-powered design makes them suitable for most household tasks, including assembling furniture or drilling into walls for shelving.
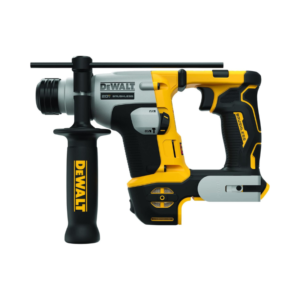
- Hammer Drills: When dealing with masonry or concrete, a hammer drill is your best bet. It combines the rotation of a regular drill with a hammering action to efficiently bore into tougher materials.
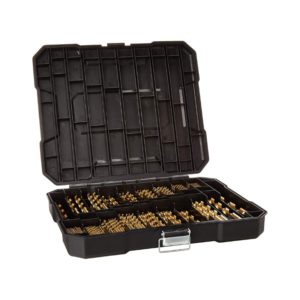
Drill Bits and Applications: Different materials require different drill bits:
- Twist Bits: Ideal for general drilling purposes, such as into wood, plastic, or light metal.
- Masonry Bits: Used with hammer drills for drilling into concrete or brick.
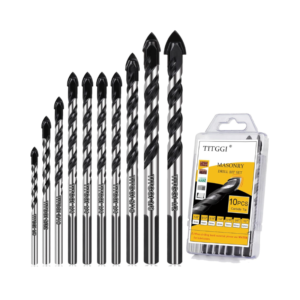
- Spade Bits: Best for drilling large holes in wood.

- Hole Saws: For making large holes in various materials, hole saws are used, typically for installations like piping or wiring.
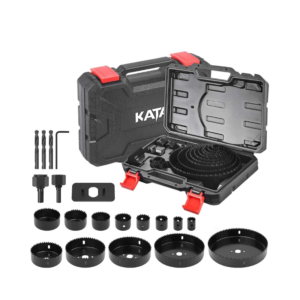
Basic Drilling Techniques:
- Choose the Right Bit: Select a bit appropriate for the material you’re drilling into.
- Mark the Spot: Clearly mark where you want to drill.
- Secure the Material: Ensure the material is clamped down or securely held.
- Start Slow: Begin drilling at a slow speed to create a guide hole, then gradually increase the speed.
- Apply Steady Pressure: Apply firm but not excessive pressure – let the drill do the work.
- Keep It Straight: Hold the drill steady and straight to ensure a clean, precise hole.
- Clear Debris: Periodically pull the bit out to clear away debris, especially when drilling deeper holes.
By understanding the various types of drills, choosing the appropriate drill bits, and following basic drilling techniques, you can confidently tackle a wide range of tasks, from simple home repairs to more complex DIY projects.
2. Saws: Types and Uses
In the world of power tools, saws are indispensable for their cutting prowess. Each type of saw is designed for specific tasks, and understanding their uses can greatly enhance the precision and efficiency of your work.
Different Types of Saws and Their Applications:
- Circular Saws: One of the most common and versatile saws, circular saws are ideal for making straight cuts in wood, plastic, metal, and masonry. They’re perfect for tasks like cutting lumber for framing or trimming plywood.
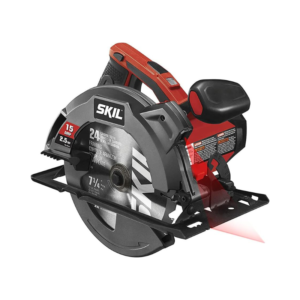
- Jigsaws: With a narrow, vertical blade, jigsaws are excellent for making intricate cuts and curved lines. They are ideal for crafting detailed work in wood, metal, or plastic, such as cutting out patterns or creating custom shapes.
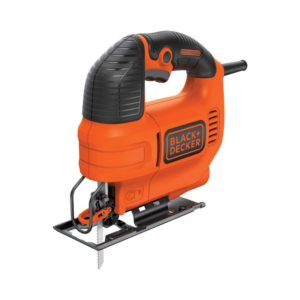
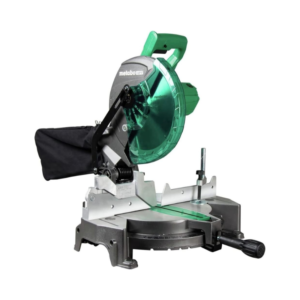
- Miter Saws: Miter saws, with their ability to make precise angled cuts, are essential for projects requiring joinery, like framing, molding, or trim work. They’re great for ensuring the perfect fit in corners.
- Reciprocating Saws: Known for their push-and-pull motion, these saws excel in demolition work and remodeling. They can cut through wood, metal, plastic, and even drywall, making them useful for tasks like cutting pipes or trimming branches.

Choosing the Right Blade:
- The material you’re cutting dictates the blade you should use. For example, woodcutting blades have larger teeth and wider gullets for removing sawdust, while metal-cutting blades have finer teeth for a smoother cut.
- The number of teeth on a blade also impacts the cut – more teeth for finer cuts and fewer teeth for faster, rougher cuts.
- Always ensure the blade is sharp and appropriate for the material and type of cut you’re making.
Basic Cutting Techniques and Tips:
- Measure and Mark: Accurately measure and mark your cutting line for precision.
- Secure the Material: Clamp down the material to prevent movement while cutting.
- Guide the Saw: Start the saw at full speed before making contact with the material. Use a steady, controlled motion to guide the saw along the line.
- Keep the Blade Perpendicular: For most cuts, keep the blade perpendicular to the material to ensure a straight, clean cut.
- Safety First: Always wear safety goggles and follow the saw’s safety instructions. Be mindful of your fingers and keep them away from the blade.
Understanding the various types of saws, selecting the right blade, and employing basic cutting techniques will empower you to tackle diverse cutting tasks with confidence and precision.
3. Sanders and Their Applications
Sanders are essential tools in woodworking and finishing projects, used to smooth surfaces and refine the final look of a piece. Understanding the different types of sanders and their specific uses can help achieve the desired finish efficiently and effectively.
Types of Sanders:
- Orbital Sanders: Ideal for general sanding and finishing work, orbital sanders move in small, circular motions, making them suitable for smoothing wood, removing paint, or preparing surfaces for painting or staining.

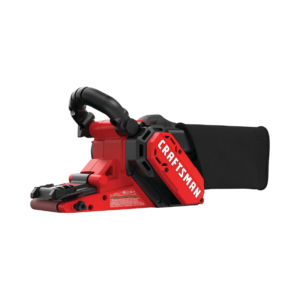
- Belt Sanders: These are powerful tools best used for heavy-duty sanding and stripping work. With a continuous loop of sandpaper, belt sanders are great for quickly removing material over larger, flat surfaces.
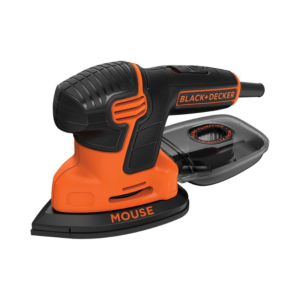
- Detail Sanders: As the name suggests, detail sanders are designed for getting into tight spaces and sanding intricate areas. They are perfect for finishing corners, edges, and detailed woodwork.
Sandpaper Grit Guide:
- The grit of sandpaper is determined by the number of abrasive particles per square inch. Lower grit numbers (like 60-80) are coarser and best for removing material quickly. Higher grit numbers (like 200-300) are finer, ideal for finishing touches and smooth surfaces.
- It’s often best to start with a coarser grit and work up to a finer grit for a smooth finish.
Effective Sanding Tips:
- Move the sander in the direction of the wood grain to avoid scratches.
- Apply even pressure, letting the sander do the work without pressing down too hard.
- For the best finish, progressively use finer grits until you achieve the desired smoothness.
- Always wear a dust mask and work in a well-ventilated area to avoid inhaling dust particles.
By selecting the right type of sander and sandpaper for your project and following these sanding tips, you can achieve a professional-looking finish, enhancing the overall quality of your woodworking or refinishing projects.
4. Other Essential Power Tools
Beyond drills, saws, and sanders, the realm of power tools encompasses a variety of other essential instruments, each serving unique functions in DIY projects. Understanding these tools expands your capabilities in home improvement and crafting.
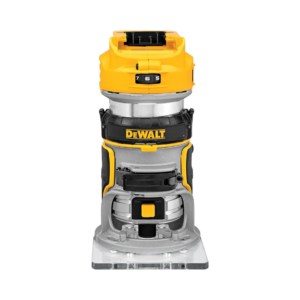
Routers: Routers are invaluable for woodworkers. They’re used to hollow out an area in hard materials, typically wood or plastic. Ideal for creating decorative edges, carving grooves, or making joints, routers enhance the aesthetic appeal and functionality of wood projects.
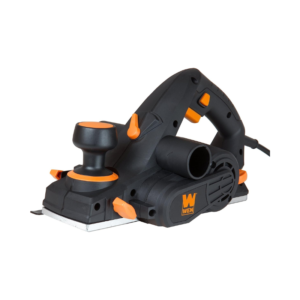
Planers: A planer is used to trim wood to a consistent thickness throughout its length and flat on both surfaces. It’s essential for smoothing rough lumber, correcting warped or twisted wood, and preparing wood for finer finishes.
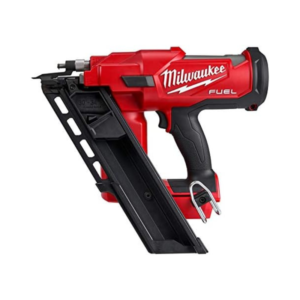
Nail Guns: Nail guns are powerful tools for driving nails into wood or other materials quickly and efficiently. They replace the traditional hammer and nail, providing speed and precision, especially in tasks like framing, roofing, or installing baseboards and moldings.
Each of these tools serves specific purposes in DIY projects, making tasks more efficient and results more professional. While they might require a bit of a learning curve, their contribution to the quality and ease of home improvement projects is undeniable. Familiarity with these tools can greatly enhance your DIY toolkit, opening up new possibilities in your crafting and construction endeavors.
Maintenance and Care of Power Tools
Proper maintenance and care of power tools are crucial not only for their longevity but also for your safety while using them. Regular upkeep ensures that your tools stay in good working condition and can prevent accidents caused by malfunctioning equipment.
Cleaning and Storing Power Tools:
- After each use, clean your power tools to remove dust, debris, or any residues. A simple wipe-down with a clean cloth can suffice for most tools.
- Store power tools in a dry, dust-free environment. If possible, keep them in their original cases or in toolboxes to protect them from moisture and dust.
- Avoid leaving batteries in tools for extended periods, especially if not in use, as this can affect battery life.
Basic Maintenance Checks:
- Regularly inspect your tools for signs of wear or damage. Check for loose components, frayed cords, and dull blades or bits.
- Keep moving parts lubricated where necessary, following the manufacturer’s instructions.
- For battery-operated tools, ensure batteries are charged and stored correctly to maximize their lifespan.
When to Seek Professional Servicing:
- If you notice any unusual noises, excessive heat, or decreased performance, it’s best to have the tool checked by a professional.
- Tools that have been dropped or damaged should also be professionally inspected, especially if there’s a risk of electrical or mechanical failure.
Importance of Regular Care: Regular maintenance of power tools not only extends their life but also maintains their efficiency and safety. A well-maintained tool is more reliable and less likely to cause accidents, making regular care an integral part of responsible tool ownership.
Conclusion
Embarking on a journey with power tools is both exciting and empowering. Understanding and safely using these tools forms the cornerstone of successful DIY projects and home improvements. We’ve explored the wide range of power tools available, from the versatile drill to the precise sander, and discussed their importance in various tasks. Safety, a non-negotiable aspect, has been underscored alongside the need for regular maintenance to ensure longevity and efficiency.
As you begin, start with basic projects to gradually build your skills and confidence. Each tool has its unique role and learning to wield them effectively will open up a world of possibilities in home improvement and crafting. Remember, with the right tools and knowledge, what once seemed daunting can become an achievable, enjoyable endeavor.
The rewards of DIY projects extend beyond the tangible results. They imbue a sense of accomplishment, foster creativity, and can even lead to significant cost savings. So, equip yourself with these power tools, respect their capabilities and limitations, and step into the rewarding world of DIY. Your journey of transforming spaces and creating with your own hands is just beginning.
Ready to turn your DIY dreams into reality? We encourage you to delve deeper into the world of power tools by exploring the wealth of detailed guides and step-by-step tutorials available on our website. Whether you’re a beginner looking to learn the basics or a seasoned DIYer seeking to refine your skills, our resources are designed to support and inspire your journey.
But your adventure with power tools doesn’t have to be a solo one. We’d love to hear about your first foray into the world of power tools – the successes, the challenges, and everything in between. Share your experiences in the comments section or reach out with any questions you might have. Your story could be the inspiration someone else needs to embark on their own DIY journey. Together, let’s build a community of creators, one power tool at a time.
continue reading
Related Posts
Introduction Gutter maintenance is often overlooked, yet it plays a […]


